


About This Unit
Fortress and Fixed Defences - Coastal Artillery, and Supporting Elements
Reference: McKenzie-Smith, Graham 2018 "The Unit Guide The Australian Army 1939-45 Vol 3 of 6 Artillery Air Defence and Engineer Units" Big Sky Publishing ISBN 978-1-925675-14-6
This is a titanic work and WW2 historians owe Graham McKenzie Smith a debt of gratitude. It has been invaluable in trying to present what was a diabolically complex and frequently re-titled organisation structure, in (we hope) digestible form.
Personnel and their Units
For the purposes of the VWMA, we will be aggregating all personnel known to have been serving in one of the Fortress elements under this generic heading. Specific reference to the particular installation in which they served may be made in the 'details' section of their service history.
The exception to this 'rule' is that we will be listing the men of the Koepang and Rabaul Batteries with their respective 'Bird Force' groupings because they largely shared the same grim fate as their colleagues.
Australia's Coastal Fortress Network
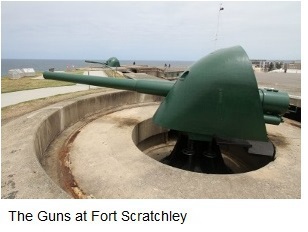
Prior to Federation and beginning in the 1870s, Colonies had established a network of coastal forts stretching from Thursday Island in the north to Rottnest Island in the west. Siting and construction had taken place, under the direction of Colonel Peter Scratchley, a noted military engineer and colonial administrator who advocated for, and oversaw the construction of the network of fortifications, coordinated among the Colonies in a remarkable piece of pre-Federation cooperation. In recognition of his contribution, the principal Newcastle installation is named after him.
The map below shows the network at its peak in WW2.

Fig 1. Map displaying the WW2 Fortress / Coastal Artillery installations
The decision to build them had followed a 'Russian Scare' after the Crimean War in 1853-6. The Russians maintained a strong Pacific fleet based in the ice-free port of Vladivostok in the NW Pacific. The perception of need was strengthened considerably, when, twenty five years after the Crimean War, the residents of Glenelg (an Adelaide beachside suburb) awoke one Sunday morning in 1882 to be greeted by the sight of a Russian cruiser squadron, bobbing gently at anchor in Holdfast Bay! It was all a harmless error in communications, as the arrival of the squadron, on a 'goodwill' visit (albeit in the era of 'gunboat diplomacy!), had been signalled from Melbourne, but an errant postal clerk had failed to pass on the message. However, it heightened the perception of vulnerability of Australia's coastal ports and towns and spurred the need to do something about it.
These fortifications protected the harbours and approaches to major coastal cities and industrial centres. During WW2, additional fortifications were established in New Guinea and adjacent islands.
Coastal Defence in Action - WW2
Two of the fortifications fired their guns 'in anger' and two others were overwhelmed by enemy air attacks.
Fort Nepean (Melbourne) fired Australia's opening shots in both World Wars, to prevent German merchant ships from fleeing Port Phillip Bay on the opening of hostilities. The barrels of these guns were for many years displayed at the entrance to Fort Nepean, when it was used as the Army's Officer Cadet School (1953-1985).

Fig 2. A 6 inch Breech loading gun of the Fort Nepean Battery, the gun that fired the opening shot of WW1, forcing the German merchantman 'Pfalz' to heave to and surrender to Australian authorities. AWM AO1184
Rabaul Battery 'Lark Force' was comprised of 2 x 6inch guns, which had been removed from the Wallace Battery at Newcastle and shipped to and installed at Rabaul. The Battery was engaged by aircaft ahead of the invasion fleet that preceded the land battle beginning on 25 January 1942. The coastal defence guns were disabled and the battle saw the Australian defenders vanquished, facing odds of over 5:1. The personnel of Rabaul Fortress were, like the remainder of Lark Force, killed or captured when Rabaul was taken by the Japanese. A significant number of PoW were murdered in the Tol Plantation massacre. A large number of the remaining PoW and civilian internees (848 POWs and 209 civilians ) were shipped to Hainan, but were lost at sea en route when the ship carrying them, the Montevideo Maru, was torpedoed by US submarine Sturgeon on 1 July 1942. It remains the worst maritime event affecting Australians. (http://montevideomaru.naa.gov.au/about/)
Koepang Battery of 'Sparrow Force' in Timor was put out of action by enemy air attack and the troops manning it took to the hills as Infantry. Most being captured.
Fort Scratchley (Newcastle) exchanged gun fire with Japanese Submarine I-21 on the night of 8th June 1942. I-21 had been part of the flotilla that had launched the Midget submarine attack on Sydney Harbour on the evening of 31 May / 1 June 1942. On the night of 8th June, I-21 surfaced off Newcastle carefully using the Nobbys Lighthouse to mask itself from observation and fire from Fort Scratchley. The submarine fired 34 pre-prepared shells at the Newcastle docks area at Carrington causing superficial damage.
Fort Scratchley returned fire, getting four rounds away. However hitting a submarine which is very low in the water, at night and moving with only momentary gun muzzle flashes as a reference is a challenging target in the extreme.
I-21 itself was lost the following year. Nothing was heard from it after its final report on 27 November 1943 off the Gilbert Islands. The Japanese submarine fleet suffered escalating losses after mid 1942 largely as a result of codebreaking and electronic intelligence efforts of the Allied Forces. (Ref: Boyd and Yoshida "The Japanese Submarine Force and WW2', 1995 Airlife Publishing UK ISBN1 85310 764 6 pp 210.
The National Coastal Defence Network - WW2
The coastal defence installations had historically been manned by small Permanent Force (PF) detachments and 'shadow posted' Militia / CMF elements.
When WW2 broke out, most of the Permanent Force personnel transferred to the 2nd AIF. Many of the pre-war Permanent Force artillerymen subsequently served in the so-called 'Letter' Batteries.
Fixed Defences were located to protect the ports of all major cities and the industrial ports, and were generally equipped with 'Naval' style 9.2 inch and 6 inch guns of various 'Marks'. Mobile Batteries of US-sourced 155mm wheeled guns augmented the fixed position defences and were generally manned by 'Letter Battery' personnel.
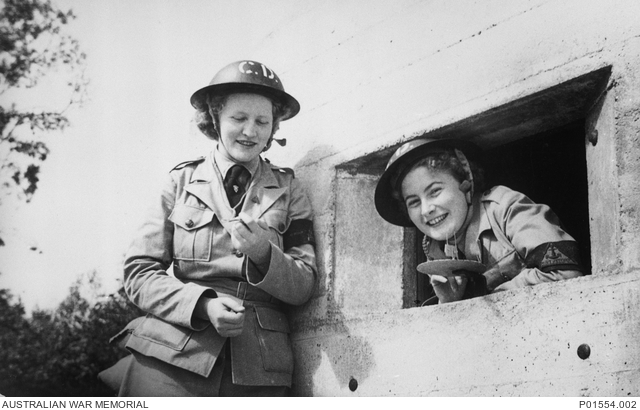
As the war progressed and the threat of invasion receded, Militia personnel were increasingly drawn away to other functions as the centre of effort moved to the north. As a result, many of the fixed defence installations were increasingly manned by Garrison Battalion, Volunteer Defence Corps and Australian Womens' Army Service (AWAS) personnel who were initially 'shadow posted' and cross-trained in Coastal Artillery (CA), Anti-Aircraft (AA) and Searchlight (S/L) battery work. In addition other components comprising engineers, signals, workshops, medical personnel and AWAS personnel were on-hand to support their operations in clerical, communications and administrative functions such as pay and procurement.

Fig 3. An Australian Women's Army Service recruiting poster for service in searchlight aand anti aircraft defence
The Command and Control elements of these installations changed titles with bewildering frequency, but because of the proliferation of references to 'Fortress' and 'Fixed Defences' in the DVA nominal rolls, we have applied that nomenclature in this case. The fixed defences were generally subordinated to the 'Lines of Communication' (LoC) / Military District Headquarters in the region.
The term 'Fortress' is applied to an area or complex rather than to a specific installation and tended to take in all of the elements assigned to the vicinity as part of the coastal defences, including the Controlling Headquarters, Heavy Gun Batteries, Engineers, Signals, Workshops, Medical and Supply personnel.
Anti Aircraft units were also similarly grouped but because of the sheer numbers of units involved, they are listed in the VWMA separately, as some tended to be moved around. As will be noted, their dispositions were very similar; often overlapping. They can be found HERE (/explore/units/3474) Similarly some Field and Medium Artillery units were at various times rotated through Coastal Defences, but it was never their primary role and they are listed elsewhere.
A listing of the Coastal Artillery and related Heavy Batteries can be found at the bottom of this page.
Northern Territory
HQ Darwin Fixed Defences (one among many name changes too numerous to list)
· Dudley Battery, Darwin – 2 x 4in Mk VII guns and 1 x 6pdr 10cwt gun
· East Battery, Darwin – 2 x 9.2in Mk X guns, 2 x 6in Mk XI guns
· Emery Battery, Darwin – 2 x 6in Mk XI guns
· Waugite Battery, Darwin – 2 x 6in Mk XI guns
· Elliot Section – 2 x 6pdr 10cwt gun twin gunmounts
· West Point Section, Darwin – 1 x 6pdr 10cwt gun
· Units rotating through included 'M' Bty which subsequently disbanded and its personnel were absorbed into the various locations, 121 Hvy Bty, 9 Hvy Bty (the people moved in and out but the guns remained)
· HQ, Fortress Engineers, Signals, Workshops and Medical
Papua New Guinea
Lae
· U Battery – 4 x 155mm guns
HQ Port Moresby Fixed Defences
· Paga Battery – 2 x 6in Mk XI guns, 2 x 6pdr 10cwt guns - 13 Hvy Bty RAA, 126 Hvy Bty RAA
· Boera Battery – 2 (?) x 155mm guns 'O' Hvy Bty
· Pari / Stokes / Pyramid / Bootless Battery - manned by C Hvy Bty (Coast) and D Hvy Bty (Coast)
· Boom Battery - 6 pdr QF
· Gemo Battery - 6 pdr QF
Milne Bay Fire Command
· Gili Gili Battery - 2 x 155mm guns - A Hvy Bty B Hvy Bty
· Dawa Dawa then Sideia Battery - 2 x 155mm guns - E Hvy Bty
· Kana Kopa Battery - 2 x 155mm guns - G Hvy Bty then H Hvy Bty
· Bou Battery - B Hvy Bty
· Oro Bay Battery - U Hvy Bty (Coast)
Rabaul Fortress
· Praed Point Battery – 2 x 6in Mk VII guns.
Koepang
· 2nd/1st Hvy Bty - 2 x 6 in MkXI guns
Queensland
HQ Torres Strait Fixed Defences
· Endeavour Battery – 3 x 60 pdr Mk 1 replaced by 2 x 6in Mk XI guns
· Goods Battery – 2 x 6in Mk XI guns
· Kings Battery – 2 x 18pdr Mk IV guns
· Milman Battery, Thursday Island – 1 x 4.7in gun 128 Hvy Bty
· Turtle Battery – 2 x 155mm guns Q Hvy Bty
· HQ, Engineers, Signals
Cairns Coastal Artillery
· False Cape Battery, East Trinity – 2 x 155mm guns H Hvy Bty then S Hvy Bty
Townsville Fixed Defences / HQ Townsville Fortress
· Magazine Battery, Signal Hill South Townsville – 2 x 155mm guns A, B, C, D, L, T and U Hvy Bty
· Kissing Point Battery, North Ward – 2 x 4.7in Mk IV guns 121 Hvy Bty later 16 (Qld) VDC Bn
· Magnetic Battery, Magnetic Island – 2 x 155 mm guns B, L T, Hvy Bty
· Cape Pallarenda Battery, Pallarenda – 2 x 4.7in Mk IV guns
HQ Brisbane Fortress
· Bribie Battery, Bribie Island – 2 x 6in Mk XI guns 13 and 7 Garrison Battalions and 2nd/2nd Guard Battalions and then elements of 6 (Qld) Battalion VDC crewed the guns
· Skirmish Battery, Bribie Island – 2 x 155mm guns D, E, F, L and P Hvy Bt cycled through the site.
· Cowan Battery, Moreton Island – 2 x 6in Mk XI guns 13 and 7 Garrison Battalions and 2nd/2nd Guard Battalions and then elements of 6 (Qld) Battalion VDC crewed the guns
· Rous Battery, Moreton Island – 2 x 155mm guns O,P,S Hvy Bty followed by elements of the 6th (Qld) VDC Battalion.
· Lytton Battery, Lytton – 1 x 4.7in gun a training site including 1 CASL which was integrated into Lytton Bty.
· Brisbane Fixed Def, Qld LoC Fixed Def, AA Gp S Qld, 7 Garrison Bn, A Gp VDC
· HQ, Fortress Engineers, Signals, Workshops and Medical
New South Wales
HQ Newcastle Fixed Defences
Port Stephens Fire Command
· Tomaree Battery, Shoal Bay – 2 x 6in Mk VII guns 20 Garrison Battalion, 5th (NSW) VDC Bn, 116 & 117 CASL incorporated.
Newcastle
· Park Battery, The Hill – 2 x 6in Mk VII guns 120 CASL Sec integrated and the Bty augmented by 5th (NSW) Bn VDC
· Nobby's (aka Rail / Mole) Section - twin 6pdr QF 5th (NSW) Bn VDC
· Scratchley Battery, (Fort Scratchley) Newcastle East – 2 x 6in Mk VII guns and 1 x 6pdr 10cwt gun. Integrated with 119, 164, 182 CASL. Augmented by 5th (NSW) Bn VDC
· Wallace Battery, Stockton – 2 x 9.2in Mk X guns. 118 and 163 CASL integrate and the Bty augmented by 5th (NSW) Bn VDC
· HQ, Fortress Engineers, Signals, Workshops and Medical

Fig 4. Fort Scratchley from the town side. Its gun emplacements are beyond the barracks. They are still fired (using blank cartridges!) on open days and the like. The Fort is an excellent tourist destination. (https://www.battleforaustralia.asn.au/Fort_Scratchley.php)
HQ Sydney Fortress
Hawkesbury Fire Command
Brooklyn Battery 18pdr Mk IV, 2pdr AT guns 31 and 2 Garrison Battalions supported by 8th (NSW) Battalion VDC. 121 CASL integrated.
Juno Battery - 2 x QF 18pdr Mk IV guns 123 CASL integrated. 31 Garrison Battalion and 8th (NSW) Bn VDC
West Battery - 2 x 4.7in MkIV guns 124 and 183 CASL integrated. 2 Garrison battalion asupported by 8th (NSW) Bn VDC
Tumbledown - formed from West Battery to better cover Resolute Bay deemed to be a potential landing site. 121 CASL integrated. *th (NSW) Bn VDC
HQ Sydney - HQ NSW LoC Fixed Defences / Sydney Fortress
Command and Control underwent numerous name changes.
Initially the key batteries were combined Militia and Permanent Force personnel manned the guns but from 1943 the Search Light Sections were integrated and the 7th (NSW) Bn VDC progressively assumed responsibility. In the Botany Bay area 9th and 10th (NSW) Bn VDC assumed this responsibility.
· Shelly Sec, Shelly Head, Manly – 1 x 12 pdr 12cwt gun 122 CASL integrated.
· North Battery, North Head – 2 x 9.2in Mk X guns Militia / Permanent Force until 1943 125, 159 CASL integrated

Fig 5. No. 2 Gun North Head, a 9.2 inch gun, firing to sea. With a range of 28km (Manly to Palm Beach), these guns were the largest employed in Australia's WW2 coastal defence.
· Casemate Battery, Middle Head – 2 x 6pdr 10cwt guns

Fig 4 - Middle Head Emplacements
· Middle Head Fortifications, Middle Head – 2 x 6in Mk VII guns, 1 x QF 12 pounder gun 131 and 160 CASL sec
· Hornby Battery, South Head – 2 x 6in Mk VII guns 162 CASL 186 CASL integrated.
· Signal Battery, South Head – 2 x 6in Mk XI guns 126 CASL
· West Battery, West Head – 2 x 4.7in guns
· Malabar Battery, Malabar Headland, Malabar – 2 x 6in Mk XII guns 127 CASL, 9th (NSW) Bn VDC
· Banks Battery, North of Cape Banks, La Perouse – 2 x 9.2in Mk X guns 129 CASL 203 9.2" Gun section integrated, 9th (NSW) Bn VDC
· Henry Battery, Henry Head, La Perouse – 2 x 18pdr Mk IV guns 161 CASL 9th (NSW) Bn VDC
· Bare Island Cronulla sections9th and 10th (NSW) Bn VDC
· HQ, Fortress Engineers, Signals, Workshops and Medical
HQ Port Kembla Fortress initially manned by 127 Hvy By (Permanent Military Forces)and as defences in both locations were expanded, Kembla separated from HQ Sydney Fixed Defences in 1942. Later 2 Garrison Battalion VDC and 12th (NSW) VDC Bn manned the guns.
· Breakwater Battery, Port Kembla – 2 x 6in Mk XI guns 132 CASL
· Drummond Battery, Coniston – 2 x 9.2in Mk X guns 1 x 9.2" Gun
· Illowra Battery, Port Kembla – 2 x 6in Mk XI guns 133 CASL,
· Fortress Engineers, Signals, Workshops and Medical
Tasmania - HQ Hobart Fortress 7 Hvy Bty RAA (PMF) and 17 Hvy Bty (Mi) initially crewed the guns. 6 Garrison Battalion and Hobart Coastal Artillery (CA) VDC was formed to take over operation fo the guns.
· Direction Battery, Hobart – 2 x 6in Mk VII guns
· Pierson Battery, Hobart – 1 x 6in Mk VII gun
· Fortress Engineers, Signals, Workshops and Medical
Victoria - HQ Port Phillip Fixed Defences. Melbourne is at the northern end of Port Phillip Bay and is accessed by a narrow channel running up the eastern side of the bay, so the focus has always been on protecting the entrnace to Port Phillip Bay. Guns established there were among the earliest of Scratchleys forts. Initially they were manned by 2 Hvy Bde (PMF) and 6 Hvy Bde (Militia); their Batteries were 4 Hy Bty (PMF) and 119 Hvy Bty (M) at Fort Queenscliff on the western heads. 5 Hvy Bty (PMF) and 118 Hvy Bty (M) manned the Fort Nepean and Fort Pearce guns to the east. The Batterioes were renamed to correspond with the forts where they were based and the arrival of militia draftees the original Batteries were depleted as their men were posted away and they disbanded. Later, personnel from the 5th and 6th (VIC) Bn VDC were posted to man the guns on the western side and from the 5th and 10th (VIC) Bn VDC on the east. A training Battery of 2 x 6inch guns was installed at Sandringham in Dec 1943 before being stood down in July 1944.
· Cribb Battery, Port Phillip – 1 x 6in Mk VII gun 140 CASL
· Crow's Nest Battery, Queenscliff – 2 x 4.7in guns and 1 x 14pdr gun 139 CASL
· Lonsdale Battery, Point Lonsdale – 2 x 6in Mk VII guns
· Nepean Battery, Point Nepean – 2 x 6in Mk VII guns 142 CASL sec
· Pearce Battery, Point Nepean – 2 x 6in Mk VII guns 141 CASL

Fig 6. Fort Queenscliff - opposite Fort Nepean at the entrance to Port Phillip Bay. Crew firing a BL 6-inch Mk VII coast defence gun at Fort Queenscliff, Victoria, Australia.
Date circa 1929 (State Library of Victoria)
South Australia - HQ Adelaide Fixed Defences / HQ SA LoC Initially manned by 10 Hvy Bty (PMF) and 120 Hvy Bty (M) they were merged to form Largs Bty. Later taken over by 3rd (SA) Bn VDC
· Fort Largs, Taperoo – 2 x 6in Mk VII guns143 CASL
· Hummock Hill Battery, Whyalla – 4 x 3.7in Mk II or III AA guns 69 AASL 6th (SA ) VDC Bn
Western Australia
Albany
· Princess Battery, Albany – 2 x 6in guns
Fremantle Fortress
· Harbour Battery, Fremantle – 2 x 6pdr 10cwt, 2 x 18pdr Mk IV guns
· Leighton Battery, Fremantle – 2 x 6in Mk VII guns
· Swanbourne Battery, Fremantle – 2 x 6in Mk VII guns

Fig 7. Leighton Battery Fremantle Fortress. Wikipedia
Garden Island Fortress (Cockburn Sound)
· Beacon Battery, Garden Island – 2 x 4in ex-US naval guns
· Challenger Battery, Garden Island – 2 x 155mm guns
· Collie Battery, Garden Island – 2 x 12pdr 12cwt guns
Geraldton
· Geraldton Battery, Geraldton – 2 x 4in ex-US naval guns, 2 x 18pdr Mk IV guns
Rockingham
· Peron Battery, Cape Peron – 2 x 155mm, 2 x 18pdr Mk IV guns
Rottnest Island
· Bickley Battery, Rottnest Island – 2 x 6in Mk XI guns
· Oliver's Battery, Rottnest Island – 2 x 9.2in Mk X guns
Coastal Artillery Regiments and Batteries:
1 Heavy (Hvy) Regiment (Regt) RAA was equipped with 155mm US-sourced guns, normally classified as 'Medium' Artillery but reclassified because they were intended for a Coast Defence role. The Regiment was split to create M, N, O, P and Q Hvy Bty and used to man their mobile 155m guns in Australia and New Guinea.
The 'Letter Batteries' - A/R, B/C, C/F, D, E, F/B, G, H, J, K, L, M , N, O, P, Q, S, T, U, X Batteries. They also had 'Coastal Artillery Search Light' (CASL) Sections attached - which became fully integrated with their supported Battery in due course and tranferred from RAE to RAA. Most had been disbandeed by Apr 1945 as the need for defence against the Imperial Japanese Navy (IJN) had diminished.
On the outbreak of war the following artillery structures manned coastal defences as shown:
8 Hvy Bty(P) / 122 Hy Bty (M) - Brisbane
121 Hvy Bty (M) Townsville
128 Hvy Bty (M) Thursday Is
1 Hvy Bde (P) / 5 Hvy Bde (M) - Sydney
12 Hvy Bty (P) / 115 Hvy Bty (M) - 9.2in guns Sydney
1 Hvy Bty (P) / 116 Hvy bty (M) 6 inch guns Sydney (north)
2 Hvy Bty (P) / 114 Hvy Bty (M) 6 inch guns Sydney (south)
127 Hvy Bty (M)
3 Hvy Bty (P) / 113 Hyvy Bty (M) Newcastle
2 Hvy Bde (P) / 6 Hvy Bde (M) - Port Phillip
4 Hvy Bty (P) / 119 Hvy Bty (M) - Port Phillip West
5 Hvy Bde (P) / 118 Hvy Bty (M) - Port Philip East
7 Hvy Bty (P) / 117 Hvy Bty (M) - Hobart
10 Hvy Bty (P) / 120 Hvy Bty (M) - Adelaide
3 Hvy Bde (P) / 7 Hvy Bde (M) - Fremantle
6 Hvy Bty (P) / 125 Hvy Bty (M) - Rottnest Is
11 Hvy Bty (P) / 123 Hvy Bty (M) - Fremantle
11 Hvy Bty (P) det / 124 Hvy Bty (M) - Albany
Compiled by Steve Larkins July 2021


Click images to start slideshow.