


17526 / 17329 Mounted
PARRY, Wilfred James
| Service Numbers: | 54, SX2517 |
|---|---|
| Enlisted: | 19 August 1914, Machine Gun Section |
| Last Rank: | Private |
| Last Unit: | 53rd Infantry Battalion |
| Born: | Queenstown, South Australia, Australia, 15 April 1894 |
| Home Town: | Port Augusta, Port Augusta, South Australia |
| Schooling: | Not yet discovered |
| Occupation: | Locomotive Cleaner |
| Died: | Old age, Adelaide, South Australia, Australia, 3 June 1968, aged 74 years |
| Cemetery: |
Centennial Park Cemetery, South Australia |
| Memorials: | Brighton Glenelg District WW2 Honour Roll, Glenelg Town Hall Memorial Book , Myrtle Bank War Memorial, Port Augusta District WW2 Honour Board, Unley Town Hall WW1 Honour Board |
World War 1 Service
| 19 Aug 1914: | Enlisted AIF WW1, Private, 54, 3rd Light Horse Regiment, Machine Gun Section | |
|---|---|---|
| 22 Oct 1914: | Embarked Private, 54, 3rd Light Horse Regiment, HMAT Port Lincoln, Adelaide | |
| 22 Oct 1914: | Involvement Private, 54, 3rd Light Horse Regiment, --- :embarkation_roll: roll_number: '1' embarkation_place: Adelaide embarkation_ship: HMAT Port Lincoln embarkation_ship_number: A17 public_note: '' | |
| 11 Nov 1918: | Involvement Private, 54, 53rd Infantry Battalion |
World War 2 Service
| 30 Apr 1940: | Involvement Sapper, SX2517 | |
|---|---|---|
| 30 Apr 1940: | Enlisted Australian Military Forces (WW2) , Private, SX2517 | |
| 30 Apr 1940: | Enlisted Adelaide, SA | |
| 25 Sep 1943: | Discharged Australian Military Forces (WW2) , Private, SX2517 | |
| 25 Sep 1943: | Discharged |
Help us honour Wilfred James Parry's service by contributing information, stories, and images so that they can be preserved for future generations.
Add my storyBiography contributed by Adelaide Botanic High School
Wilfred "Jim" James Parry, born 15th April 1894 in Queenstown, South Australia, enlisted in the Machine Gun Section of the Third Light Horse Regiment at the age of twenty. At the time of enlistment, Parry was employed as a locomotive cleaner at the Mile-End railway running sheds. He spent his childhood very near his place of birth: Glen Osmond, South Australia. Parry was born to Elizabeth Wright and James Martin Parry, a butcher on Glen Osmond Road. Parry always loved horses, even owning one as a boy and occasionally holding up the traffic on Glen Osmond Road to conduct horse races.
Enlistment and Training
On the 19th August 1914, at the Keswick Barracks, Parry signed the enlistment forms and, being one of the first Australians to do so, earned the Regimental number 54. After spending the next two months training in the Morphettville training camp, Parry embarked on HMAS Port Lincoln with the rest of the Third Light Horse to eventually arrive in Alexandria, Egypt between the eighth and fourteenth of December.
Parry trained in Alexandria until early May of 1915 when he embarked for Gallipoli. Parry celebrated his 21st birthday while enroute to Gallipoli.
Gallipoli
On the 9th May, the Third Light Horse Regiment landed at Anzac Cove, joining the Australian and New Zealand Division already entrenched there. Parry’s first wound, documented only as a “slight wound” was received five days after landing at Gallipoli at Monash Valley, with his next of kin, James Parry, being notified immediately. The only further information on this wound was that it was “not reported seriously” implying that he was most likely grazed by a bullet or bayonet. This may also be the time when Parry lost his toe, as it is mentioned in A Family Story, by G. R. Bailey, Parry’s nephew. No records indicate that he was hospitalised.
Throughout the Gallipoli campaign, the Third Light Horse played a defensive role, and was placed in reserve during the August offensive, including through the Battle of Sari Bair and the Battle of the Nek. A Family Story reports that Parry was, at least for part of the campaign, stationed in a trench too shallow to stand erect in during the day. On the 16th August, Parry was admitted to the No. 1 General Hospital in Heliopolis for gastritis and stayed there until transferring to the convalescent hospital on the 2nd September.
On 5th September he returned to Base, Zeitoun, and remained there until he rejoined regiment 25th October 1915. From then, Parry either was sick again, and spent some time in Egypt recovering, or he may have only been marked as rejoining his Regiment by the Details Camp in Heliopolis on the 31st of October. Despite those uncertainties, it is certain he was admitted to Destroyer Hill as sick on the 8th of November, returning to duty the next day. Eventually, on the 20th December, the Australia and New Zealand Army Corp (ANZAC) evacuated Gallipoli, with Parry taking the Karroo to disembark in Alexandria.
Western Frontier Force
The First Light Horse Brigade was assigned to the western frontier force — focusing on the Middle East — immediately after the evacuation of Gallipoli, although they only physically joined on the seventeenth of March 1916. The early months of 1916 were spent focusing on the security of Western Egypt; the British Empire partnered with Italy to fight against the Senussi, a religious order of Arabic nomads in Egypt and Libya.
Apart from being admitted to the First Light Horse Field Ambulance in Sohag on the 10th April for a day with dental issues, there are no further records of Parry’s activity until the 18th July, when he transferred to the First Light Horse Brigade Machine Gun Squadron. Parry was “taken on strength” by Machine Gun Squadron at Romani on the 23rd July.
He was admitted to the field ambulance with septic sores on his feet 29th July and was transferred to 31st General Hospital in Port Said 30th July were he was also diagnosed with “ITC” (intestinal trouble/colitis). He rejoined his unit from hospital 3rd August 1916 after being promoted to Corporal on the 1st August.
The Suez Canal
After his return to duty, Parry’s squadron was involved in a major strategic battle: the Battle of Romani. In the Battle of Romani, the combined Ottoman and German forces attempted to threaten the Suez Canal by taking the town of Romani. The fighting lasted from the fourth to the fifth of August. A Family Story states:
“the only reason Corporal Parry did not receive a Military Medal for his part in this battle was because of his promotion. It appears that after such actions, the powers that be allocated a certain number of decorations, and as he had so recently been rewarded with a promotion, someone else received the medal. I assume that this battle was the time when Jim Parry and his section were guarding a water well, and were attacked by a greatly superior force. They were shelled for a long time, then attacked, but beat it off after inflicting some 300 casualties on the enemy. My Uncle stood up to photograph the battlefield, and had just replaced his folding Kodak camera in its pouch when a shell went off, and a piece of shrapnel lodged in the camera completely wrecking it. The camera saved his life as it was over his groin, and when he sent it home Kodaks wanted to buy it, and use it for some time in a window display.”
Over the next few months, the First Light Horse Brigade was involved in a long series of skirmishes and raids, securing water sources and protecting infrastructure, with many long marches and patrols. They had no further major engagements until the 23rd December, in which they were engaged in the Battle of Magdhaba. This is one of the many times when it is possible that one of Parry’s anecdotes occurred: A Family Story mentions a time when Parry was riding his horse — who remained with Parry throughout the campaign — and was hit by a shell in the saddle; any higher and he would have been hit, and any lower, his horse.
Sinai and Palestine
The Battle of Magdhaba, 23rd December 1916 — in which it is almost certain Parry was actually present — was another major victory for the Allied Forces. In this battle, the ANZAC Mounted Division encircled the Ottoman position after an overnight march from El Arish. The assault began well, but by midday, the assault had slowed to a stop, with the Ottoman machine guns giving heavy fire. Eventually though, reinforced flanking attacks, which were notably done by the First Light Horse Brigade, broke through the enemy lines. The final result of the battle was less than 150 casualties on the ANZACs’ side, and more than 1,200 Ottomans captured, with more than Ottoman 300 casualties. Parry’s role in the battle was, as a Corporal, commanding a gun team that would have enfiladed trenches, provided suppressive covering fire during rushes, and prevented Ottoman counterattacks. The decisive victory provided the Allied Forces with an open path to Palestine.
On the 9th of January 1917, the First Light Horse Brigade participated in the Battle of Rafa, a former police post on the border of Egypt. After the Battle of Magdhaba, Rafa was the only Turkish outpost guarding the Palestine frontier. A strong defensive series of trenches made the fighting slow-going, and even though the ANZAC Mounted Division (most likely including Parry) had surrounded the outpost before dawn, mid-afternoon saw the commander considering withdrawing. Despite suffering from a shortage of reserves, ammunition and water, the units ignored Lieutenant General Sir Phillip Chetwode’s command to retreat, and a renewed cavalry attack saw the Turkish defence crumble.
Over the ensuing months, from January to April, the First Light Horse Brigade returned to patrolling and skirmishing, preventing the Ottoman troops from returning to Sinai. This time was used by the Allied Forces to construct infrastructure such as trainlines, pipelines, and supply chains. Once these were constructed, Parry’s unit moved to its first unsuccessful battle: the First Battle of Gaza. The coastal city of Gaza had already been attacked by the British three weeks prior, but the attack was unsuccessful.
Gaza
During the First Battle of Gaza, which took place on the 26th March 1917, two British infantry divisions worked with the ANZACs to attempt the capture of Gaza. While the mounted troops, most likely including Parry, made relatively good progress, managing to capture high ground north of the city and infiltrating parts of it, the infantry did not fare as well. The infantry’s lack of progress caused Lieutenant General Dobell — a British officer — to withdraw with the setting of the sun. His fear of the cavalry not making enough progress was ultimately a mistake, as the Ottomans had been bolstered by reinforcements by morning, and the positions that the cavalry had sacrificed were not retaken. Afterwards, according to the Australian War Memorial (AWM), “A stint of protective duty along the line of communications through the Sinai followed [until the Third Light Horse Regiment — and Parry’s, being a part of the Brigade his old regiment was in] next major engagement”.
On the 17th April 1917, the Second Battle of Gaza begun. By this time, the Turkish defences had been strengthened due to the threat of the Allied Forces. To remedy this, six tanks and gas shells supported the frontal attack on the Turkish defences. The assault was a complete failure, as the tanks and gas had little-to-no effect, and the attacking forces made little ground. The attack proceeded for three days before being called off, having made no significant changes to the Turkish position.
The Third Battle of Gaza saw Gaza’s garrison bombarded for six days with three divisions deployed. This was a ruse to attempt to make the Ottomans believe that another frontal attack would need repelling. It is very likely that Parry and his unit were a part of the diversion as the Battle of Beersheba was fought to the east. Beersheba fell to Allied efforts on the thirty-first of October, allowing the Allied Forces to outflank the Ottoman defences, eventually leading to the fall of Gaza on the seventh of November. One uncertain possibility is that the First Light Horse Brigade was a part of the Battle of Beersheba, but it is far more likely that they were merely involved in the diversion.
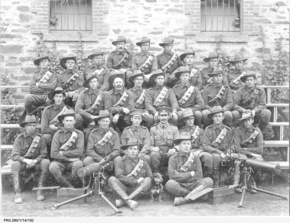
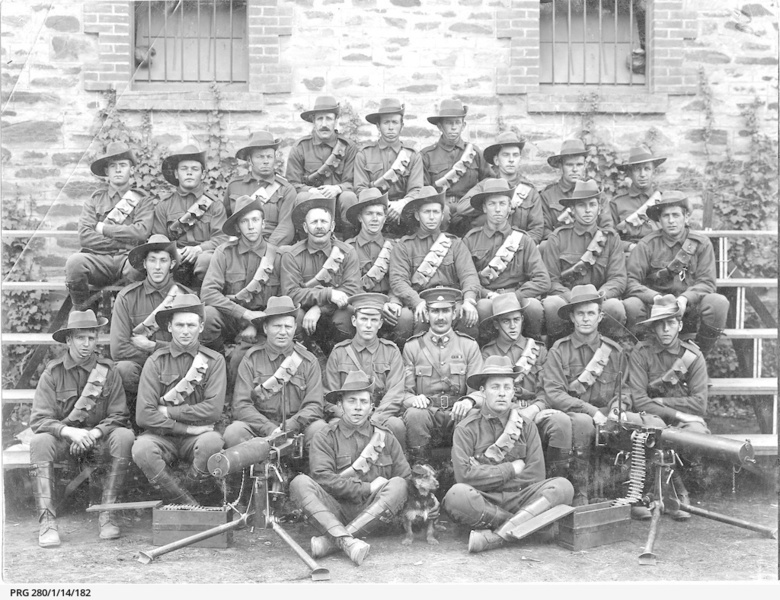
Extrapolating from Parry’s next location, the School of Instruction in Zeitoun, it is likely that he fought well in the Battle(s) of Gaza, as he returned to his unit in Kilo 9 on the 16th September and was qualified as an instructor of the Vickers Gun 27th September 1917 . The Vickers Gun played an influential part in much of the war, and was so successful that it remained in service until the 1960s. It required a minimum of three men to operate, but often required more for transportation and maintenance. Being a corporal, Parry would have most likely led one of these teams.
After this battle, the Allied Forces advanced to Jaffa before “committ[ing] to operations to clear and occupy the west bank of the Jordan River”, as it is put by the AWM. Further research is required on the actions in this period. The next known major event is the First Amman Raid which spanned from the twenty-second to thirtieth of March in 1918, the final year of the war.
Amman
The First Amman Raid aimed to inflict Ottoman casualties and end railway communications with Damascus. Inferring from the Allied Forces securing the west bank of the Jordan River, the raid took place on the east of the river. The raid began with the crossing of the Jordan River on the twenty-second. Conditions were difficult, but by dusk on the twenty-fifth of March, the village Es Salt was taken. This was a strategic capture that allowed Amman to be the main focus of the raid. It is most likely that Parry was not a part of attacking Amman itself. It is uncertain what Parry and his squadron were doing, but it can be reasonably inferred that the First Light Horse Brigade was a part of other fighting or securing the area surrounding Es Salt. After two days, the assault on Amman was called off after severely damaging the railway but eventually being driven back by the Ottomans on the thirtieth of March. By the second of April, the entire attacking force had withdrawn across the Jordan.
The previously taken town of Es Salt, abandoned due to the withdrawal, was the focus of the Second Amman Raid (also known as the Es Salt Raid). This village, situated twenty-three kilometres west of Amman, saw heavy fighting from the thirtieth of April to the third of May. The troops, commanded by Lieutenant General Sir Harry Chauvel aimed to capture the village more permanently and use it as a base of operations against that railway previously damaged. Parry experienced days of exhausting, likely non-stop fighting to defend the town, as it was captured in the evening of the thirtieth of April — the day the assault started. Ottoman counterattacks eventually led to the ANZACs once again withdrawing over the Jordan. While the original objectives were not achieved, it did divert Ottoman forces to defending more heavily near the Jordan, with the next attack coming from a new direction.
According to A Family Story, Parry met T. E. Lawrence (Lawrence of Arabia) at some point during his service, and reported that “Lawrence did not like Australians, and this fact seemed to be of some satisfaction to [Parry].” This most likely happened during the Amman Raids, as that was a time of direct cooperation between the ANZACs and Lawrence’s Arab allies. The book mentions some tensions between the Australians and these Arabs, with some Arabs allegedly slitting guards’ throats to steal weapons, and Australians retaliating every chance they could.
Consolidation
The next month was a time of extreme heat and little water, with constant patrolling interspersed with terrifying raids. Parry and his unit would have been tasked with defending against Ottoman probing attacks, assisting reconnaissance patrols, and manning machine gun posts in Jordan Valley, the site the ANZACs retreated to after the Amman Raids. Parry fought no major engagements until the fourteenth of July. This day saw a massive Ottoman infantry counterattack on Jordan Valley, which Machine Guns such as the Vickers would have been vital in driving off. While not a major battle, this attack is listed as one of the battle honours that Parry and his comrades-in-arms received. The result of the battle stabilised the frontline until mid-September, in which time Parry and his squadron would have returned to normal duties.
On the 4th September, Parry was admitted to hospital and remained there until the 13th, at which point he rejoined his unit. The First Light Horse Brigade Field Ambulance treated him, but sources do not mention why. It is likely, due to the period and his location, that he was suffering from a mosquito-borne disease such as malaria.
Ottoman Surrender
Not one week later, on the 19th September 1918, Parry’s unit was involved in the Battle of Megiddo. This is where the Second Amman Raid played its part, having tricked the Ottoman commanders into believing another frontal assault was in the offing. The final battle between the Allied Forces and the Ottoman Empire began with general Sir Edmund Allenby manoeuvring his troops to the coast, offering a new direction of attack to the First and Second Amman Raids. The offensive began with infantry advancing and breaking through the Ottoman line. This left the Ottomans vulnerable to the cavalry — including the First Light Horse Brigade, and therefore Parry and his squadron — who made quick ground and severed the supply routes sustaining the Ottoman army. Within twenty-four hours, the cavalry had advanced more than fifty kilometres into the Ottomans’ rear, capturing numerous towns and villages in the meantime. The lack of supplies and a rapid advance on Damascus by cavalry such as the First Light Horse Brigade inevitably disintegrated the Ottoman army, with the captured lands ending hope of retreat.
This massive loss, with the Allied Forces now holding Palestine, the Ottoman Empire signed the Armistice of Mudros on the thirtieth of October, an official surrender. This marked the end of Parry’s campaign, with the remaining weeks of the war spent on normal duties: most likely guarding Ottoman prisoners, patrolling, stabilising Palestine, and securing supplies and communications. The Great War ended at eleven o’clock on the eleventh of November in 1918.
Post-war
With the end of the war, Parry’s final movements were those of return to Australia; on the 15th November, he embarked the Port Darwin to return to Australia, with his next of kin advised as such the next day. Being among the first to sign up, Parry was given precedence to return home. The Port Darwin arrived in Australia on the 15th January 1919, and Parry was discharged at the Keswick Barracks on the 23rd February, after four years, 189 days, the vast majority spent abroad.
After the war, Parry worked multiple jobs, including butchering like his father, sailing on overseas vessels, and fettling for the Commonwealth Railway during the great depression. He was unmarried when World War II came around, and he enlisted with the army once again aged 46, this time repairing damaged railways in the UK.
It was his work in England that brought him to meet his first wife, Nelly Annie Brett (1897-1944), whom he married on the 22nd November 1940 during an air raid.
Parry was discharged from the army in September 1943 and lived in Port Augusta and then moved to Park ST Unley in 1944.
His wife Nelly died of cancer on the thirtieth of October 1944, sending Parry to the drink. He remained under the influence of drink for at least a few months, and perhaps even years, before eventually recovering and getting a job with the Coldstream Refrigerator Company. By this point he was living with a family member, and became friendly with a widow living next door, called Minnie Theodora Hartshorn (1883-1976). He eventually married this widow on the 15th February 1947.
Wilfred James Parry died on the third of June 1968 after 72 years of life, remaining only in memory, leaving no diary or journal behind, with most of his war experiences unspoken, due to his unwillingness to discuss them in life. He is buried in the Centennial Park Cemetery, Adelaide.
Lest we forget.
Bibliography
https://www.awm.gov.au/collection/P10923970
https://www.britannica.com/event/Armistice-of-Mudros
https://anzacportal.dva.gov.au/resources/australian-light-horse-palestine-1916-1918
https://anzacportal.dva.gov.au/wars-and-missions/ww1/politics/armistice
https://www.awm.gov.au/articles/blog/australia-arab-uprising
https://aif.adfa.edu.au/showPerson?pid=234351
https://www.ancestry.com.au/family-tree/person/tree/40430775/person/19510044524/facts
https://www.awm.gov.au/collection/C1338856
https://recordsearch.naa.gov.au/SearchNRetrieve/Interface/ViewImage.aspx?B=8007396&S=1&R=0
https://collections.slsa.sa.gov.au/resource/PRG+280/1/14/182
https://www.awm.gov.au/advanced-search?query=Wilfred+James+Parry&people=true
https://vwma.org.au/explore/units/93
https://www.findagrave.com/memorial/102087316/wilfred_james-parry
https://awayfromthewesternfront.org/campaigns/africa/the-senussi-campaign/
https://www.awm.gov.au/collection/E84339
https://www.awm.gov.au/collection/E84328
https://www.awm.gov.au/collection/U51037
https://www.awm.gov.au/collection/B00136
https://www.awm.gov.au/collection/E84825
https://www.awm.gov.au/collection/PL1267
https://www.awm.gov.au/collection/E84824
https://www.awm.gov.au/collection/E84330
https://www.lighthorse.org.au/mounted-troops/

Click images to start slideshow.